

As the days get warmer and the snow starts to melt, it’s the perfect time to give your roof a little TLC. Winter weather can be tough on your home, and your roof might have taken a beating from snow, ice, and freezing temperatures. After a long winter, checking your roof for damage or wear is an essential part of spring home maintenance. Here’s a helpful checklist to guide you through inspecting your roof after the snow melts.
1. Inspect for Missing or Damaged Shingles
Winter storms, ice dams, and heavy snow can cause shingles to shift or become damaged. Take a close look at your roof and check for missing, cracked, or curled shingles. If you notice any, it’s important to get them repaired as soon as possible to avoid water leaks.
2. Check for Ice Dam Damage
If you had ice dams over the winter, there could be potential damage underneath. Ice dams can force water under your shingles, leading to leaks inside your home. Look for signs of water damage around your attic or ceilings—stains, mold, or mildew are red flags that ice dams may have caused trouble.
3. Clean Your Gutters
Winter weather can leave your gutters clogged with leaves, twigs, and debris, which can lead to water backing up onto your roof. Now is the time to clear out your gutters to ensure that rainwater can flow freely, preventing leaks and water damage to your home.
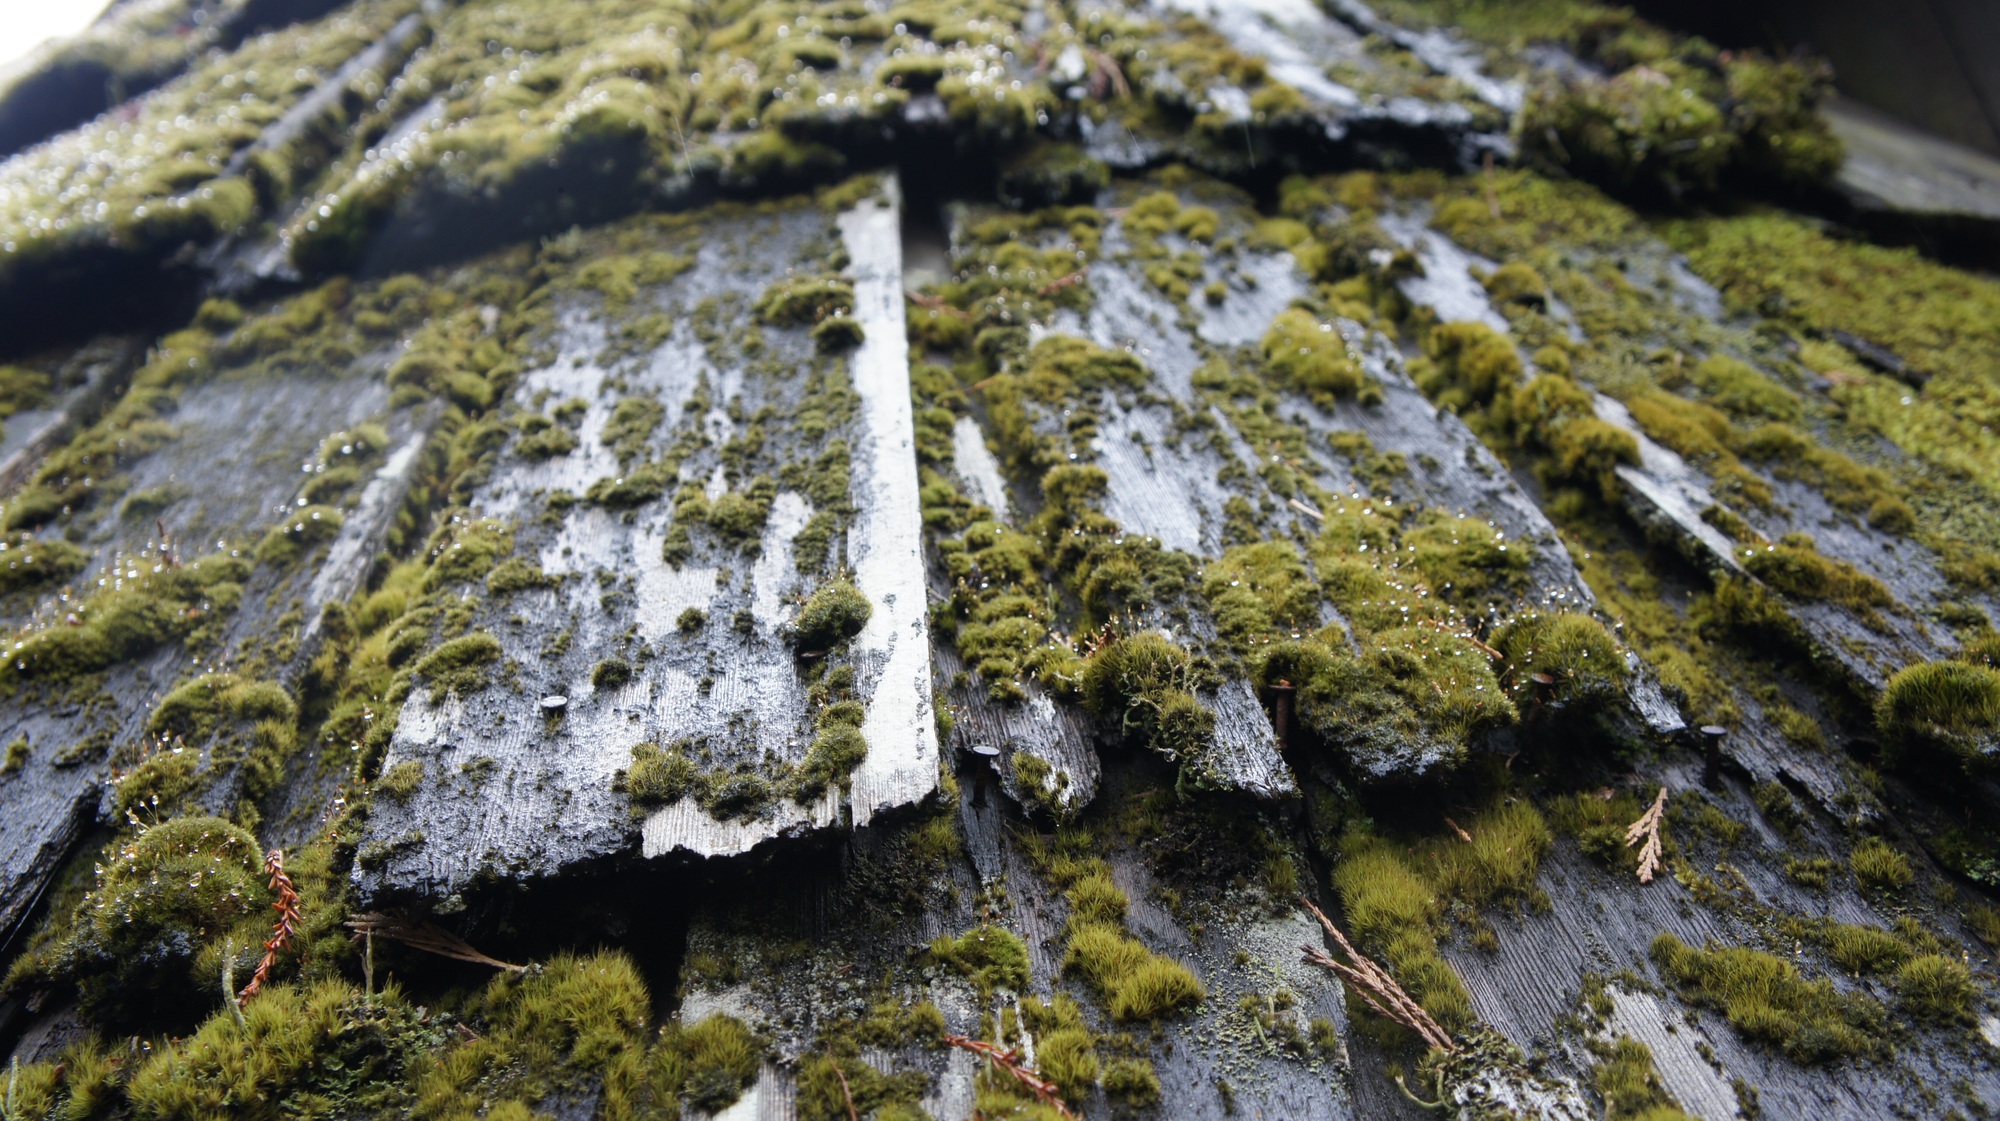
4. Look for Moss or Algae Growth
Moss and algae can thrive on damp roofs, especially in shaded areas. While this may not be an immediate concern, it can cause roofing materials to deteriorate over time. If you notice moss or algae, it’s a good idea to clean it off to protect the integrity of your roof.
5. Examine Flashing and Seals
Flashing around vents, chimneys, and skylights helps direct water away from your roof. Over time, flashing can become loose, cracked, or corroded, leading to leaks. Check the seals around these areas to make sure they’re intact, and repair or replace them as needed.
6. Inspect for Any Sagging or Dips
If you notice any sagging or dips in your roof, it could be a sign of structural damage. This can be caused by water pooling in one spot or weakened rafters. If you see any of these signs, it’s crucial to have a professional assess the situation to prevent more serious issues down the line.
7. Check the Attic for Ventilation and Insulation Issues
Proper ventilation and insulation are key to a healthy roof. In your attic, check for any signs of poor airflow or inadequate insulation. Inadequate ventilation can cause condensation and lead to mold, rot, and damage to your roof structure.
8. Look for Evidence of Pests
Winter can invite pests like rodents or birds to nest in your roof or attic. If you see evidence of pests, such as droppings or chewed materials, it’s important to take action to prevent further damage and potential health risks.
9. Get Professional Help
While DIY inspections are a great first step, it’s always a good idea to get a professional roofer to take a closer look. A roofing expert will be able to spot issues that might go unnoticed and recommend repairs or replacements to keep your roof in top shape.
At Ripcord Construction, we’re more than just a roofing company—we’re a team of real people helping homeowners like you find real solutions for your home needs. With over 15 years of experience, we are fully licensed and insured, so you can trust us to get the job done right. Contact us today at 734-288-8445 or visit our website to fill out a request form for a free estimate. Let us help you keep your roof safe and secure this spring!